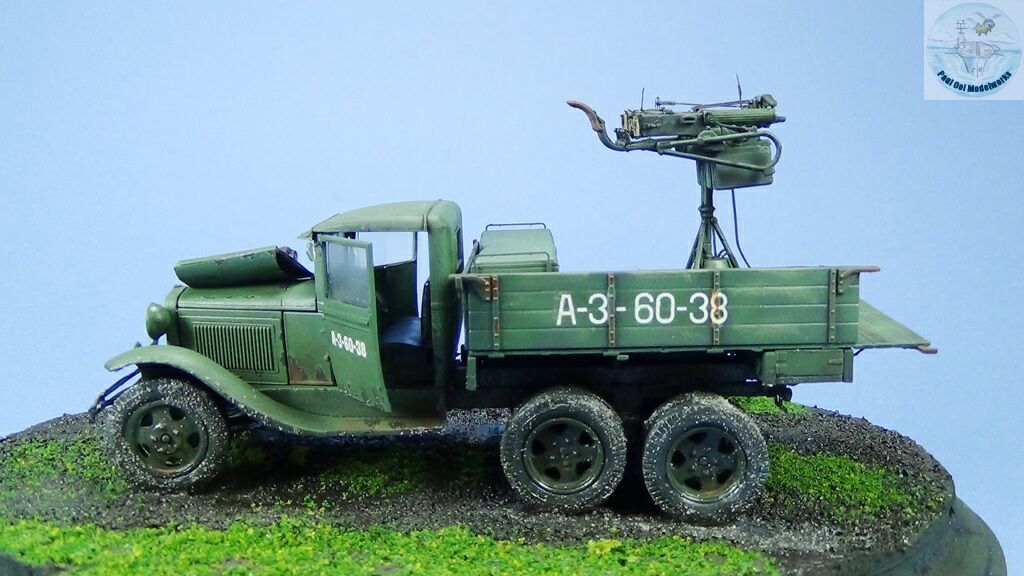
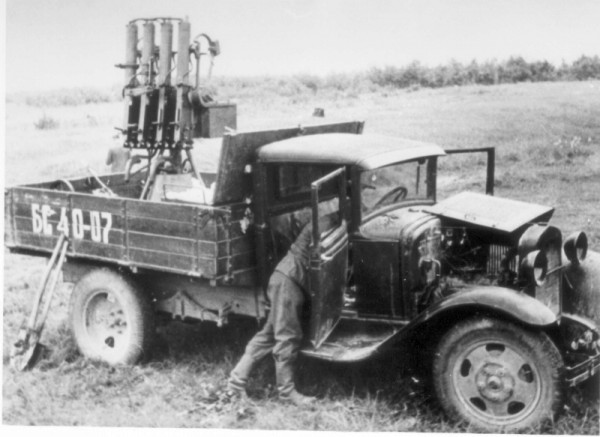
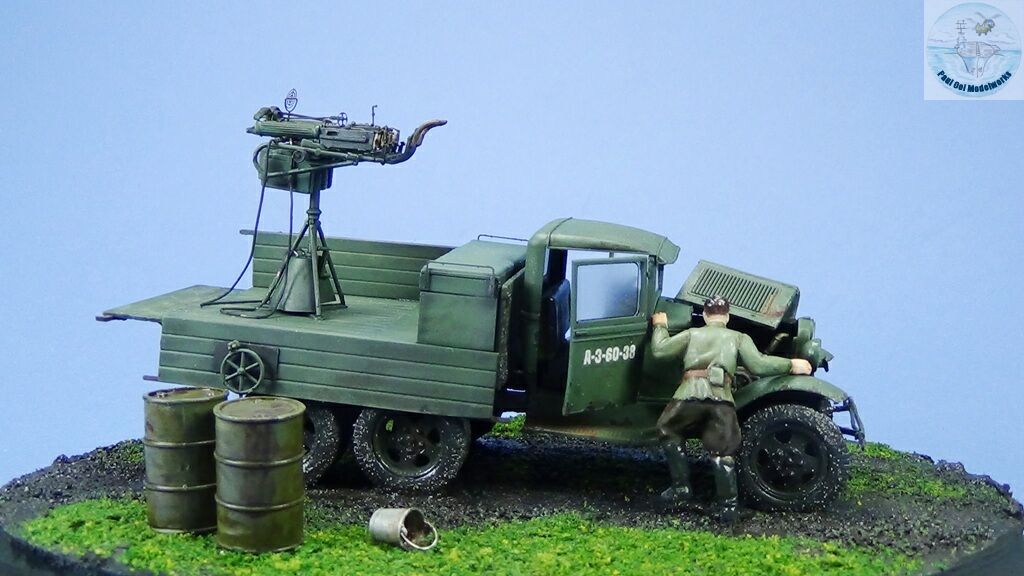
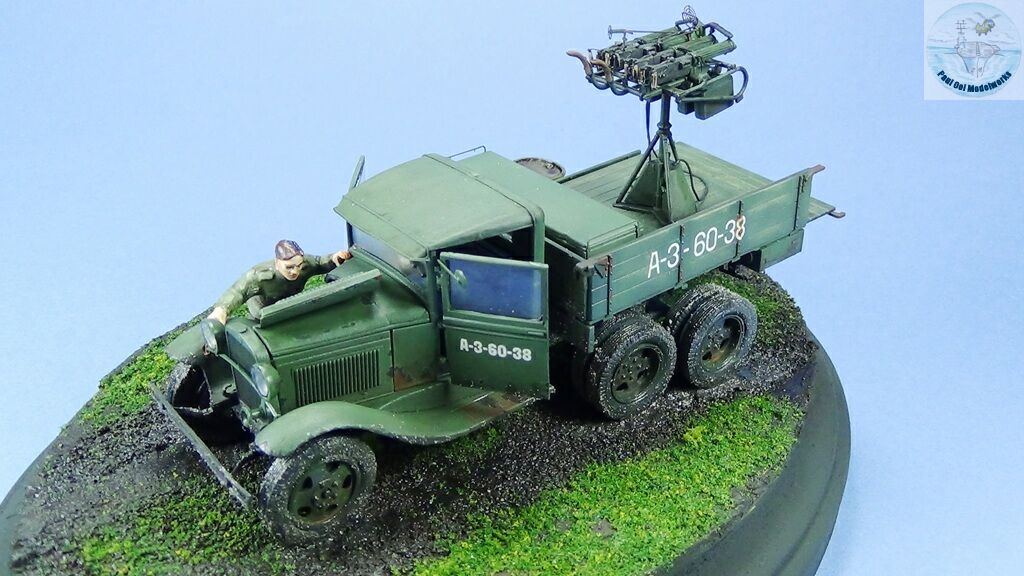
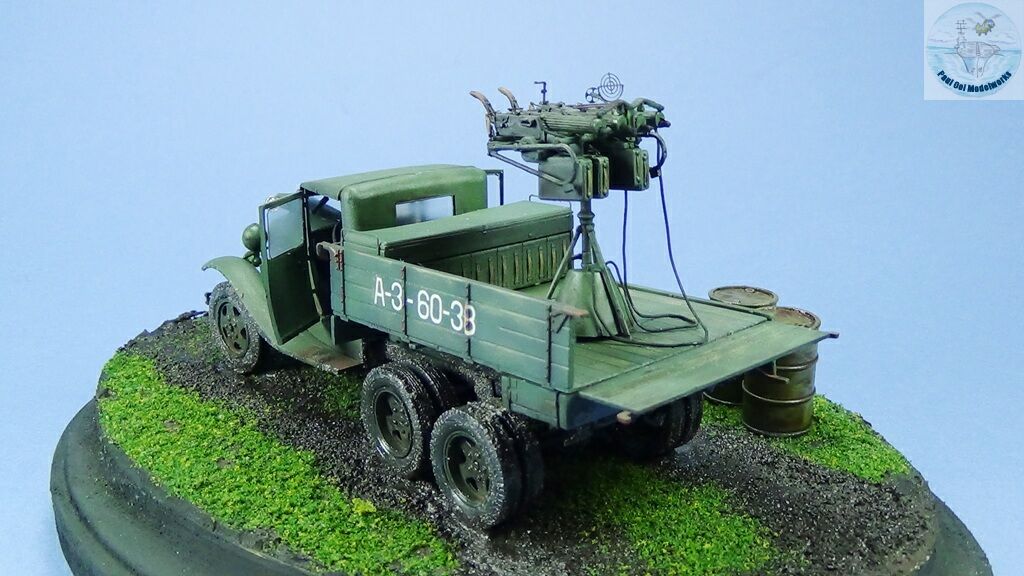
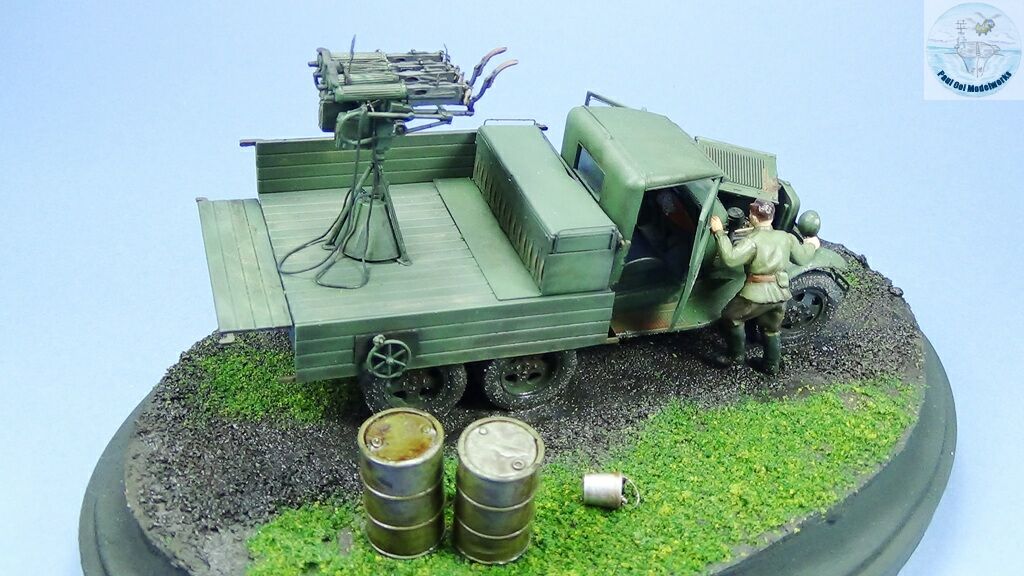
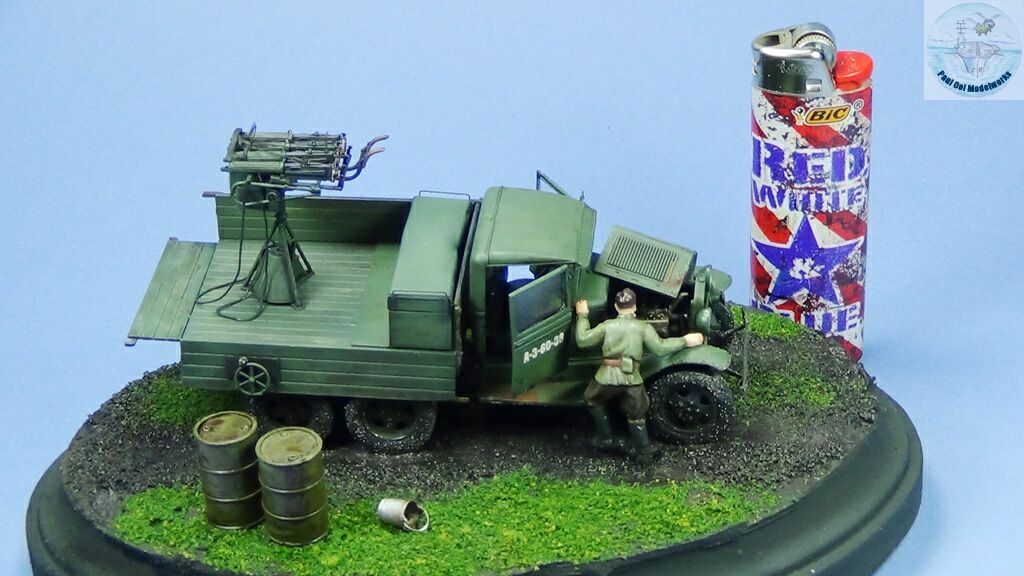
The GAZ-AAA was the three-axle version of the GAZ-MM truck, which was the licensed Soviet version of the Ford AA truck. The 2.5 tonne truck was the workhorse of the Red Army in the early part of The Great Patriotic War (as WW2 is known in Russia). Some trucks were fitted with the M4 Quad Maxim for anti-aircraft duty. This arrangement was a stopgap measure during Operation Barbarossa until heavier mobile anti-aircraft vehicles became available. Nevertheless, they could be produced in large numbers to provide support for Soviet units, and turned out to be very effective in stopping infantry assaults as mobile machine-gun platforms. They were also deadly to low flying German aircraft when concealed among buildings or trees. From this simple beginning, this anti-aircraft truck was the progenitor of the later ZSU series of air defense vehicles including the fearsome Shilka.
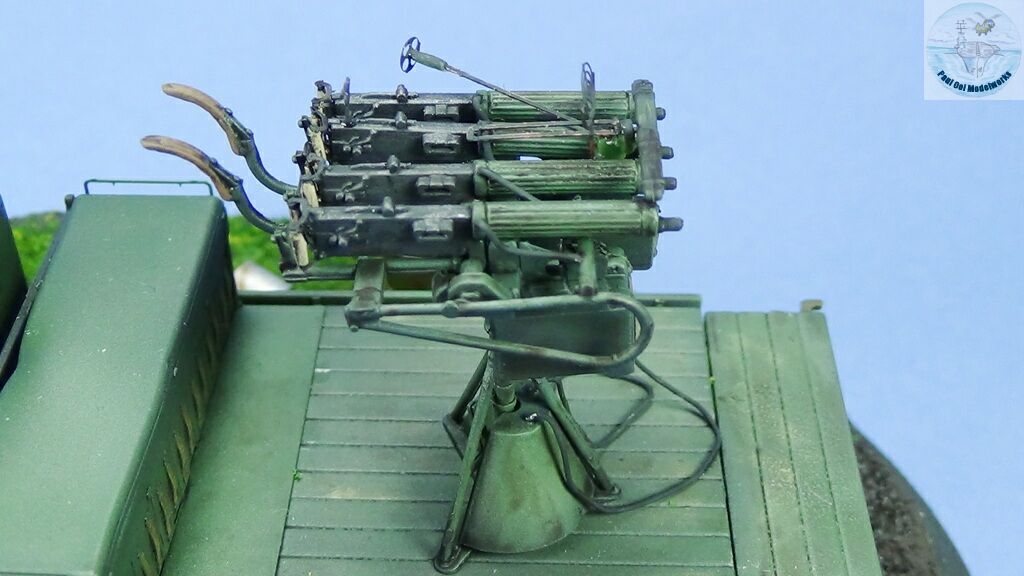
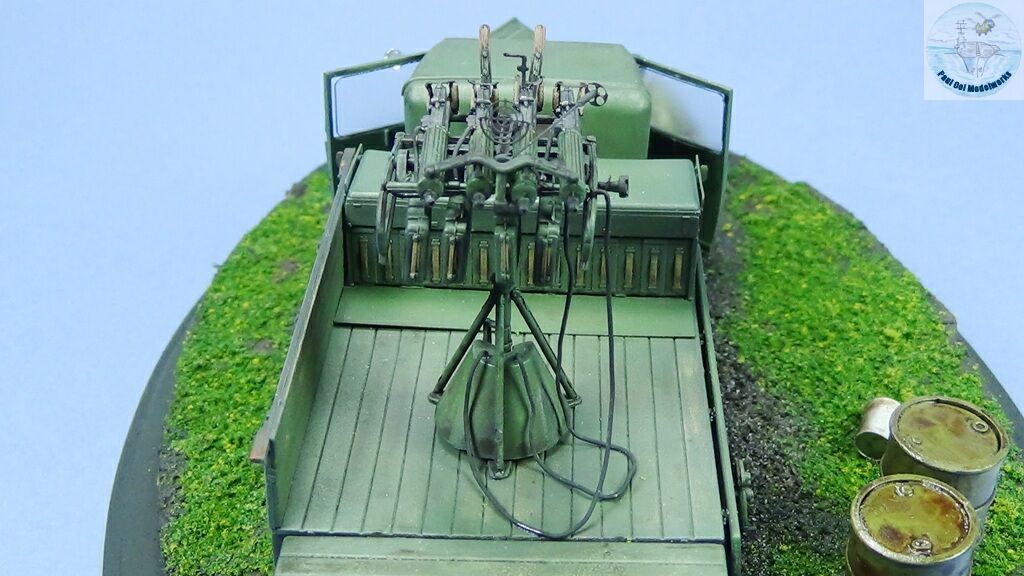
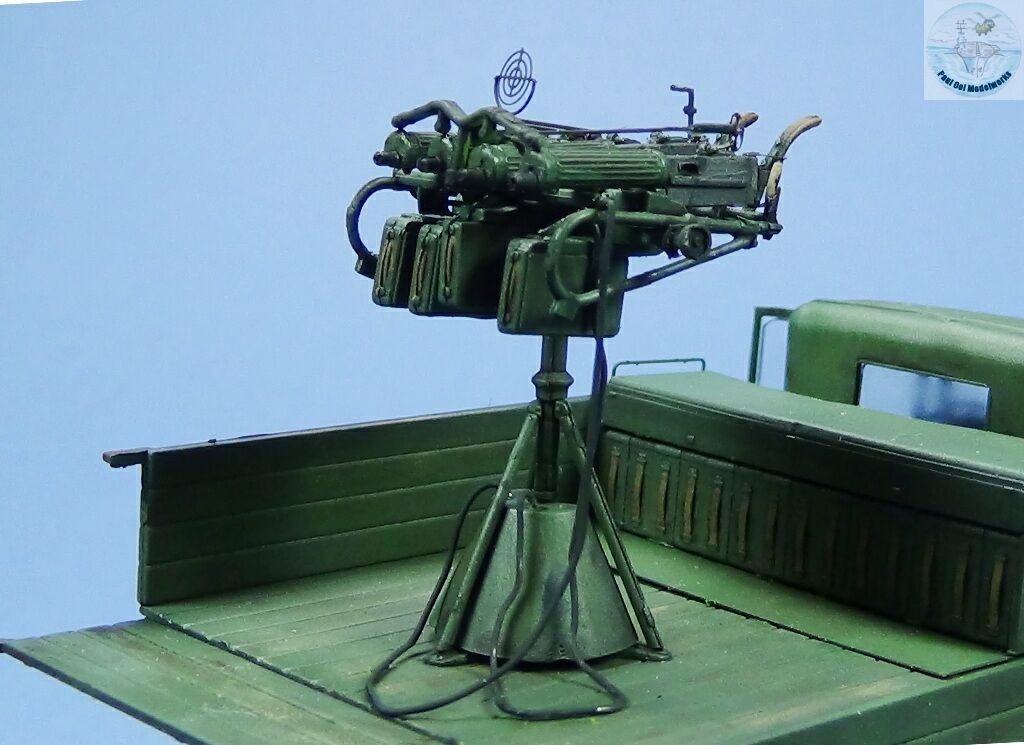
The M4 Quad Maxim was an arrangement of four M1910 water-cooled machine guns made by Tokarev in 1928 and was a mainstay for Soviet local air defense at pill-boxes, ships, and armored trains until 1945. The sheer volume of fire (600 rounds/minute each gun) could shred many soft targets and underside of low-flying aircraft. The weapon had a extra-large ammunition bins to feed the machine guns, and many more bins arranged in the cabinet on the flatbed of the truck. However, without protective shields the crew were unprotected and vulnerable to enemy counter-fire.
Gallery

Construction Notes
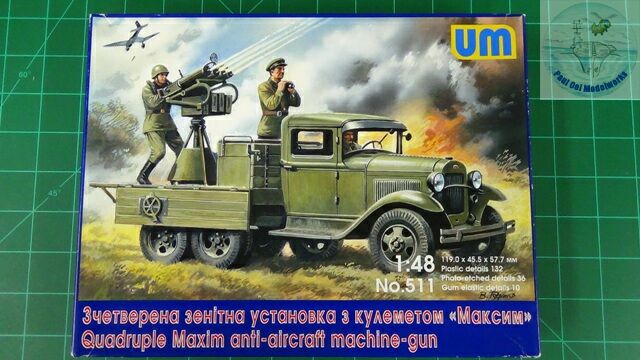
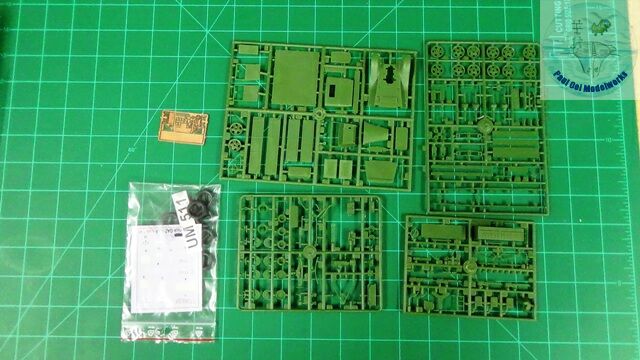 This 1/48 scale kit of this quintessential Soviet weapon by Unimodel Ukraine is fairly rare. It is a pretty detailed kit with a photo-etched fret, acetate sheet for glazing, and poly tires. Some plastic frets have fine parts that are quite fragile (my kit’s front bumper was broken upon arrival) that require careful handling. The instructions are not clear about where some parts are supposed to fit, so it requires a bit of checking to make sure that the assembly was correct. This is a moderately difficult kit and I would not recommend it for the beginner. The M4 Quad Maxim sub-assembly is like a kit-within-a-kit and very fragile and complex, especially if you want to include the water cooling hoses.
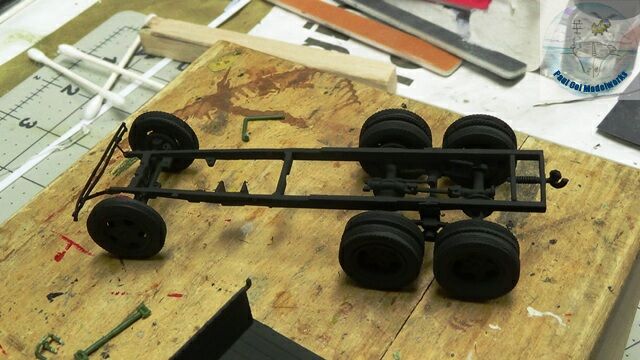
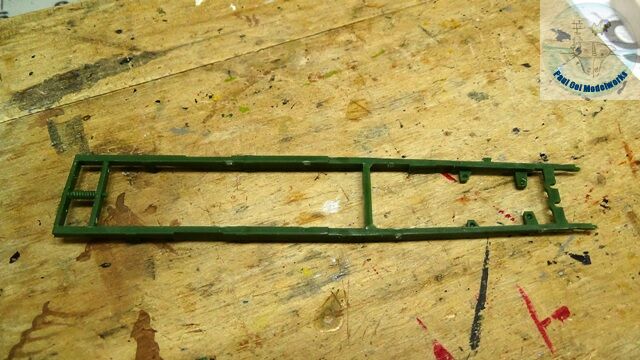 Like all truck kits, we start with the chassis frame. This frame has to be put together from the girders and cross beams.
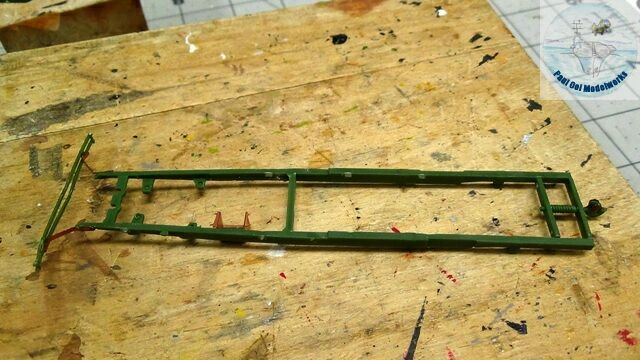
 The front bumper rail was broken so I had to repair this before attaching to the chassis frame (extreme left). Also, the bumper supports are photo-etched rails that have to be formed into this special shape using a special plastic template supplied in the kit.
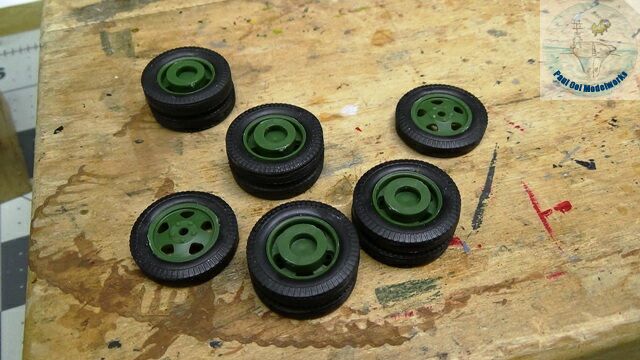 Next I made the wheel assemblies, using the poly tires pressed onto the plastic hubs. The rear wheels are double stacks.
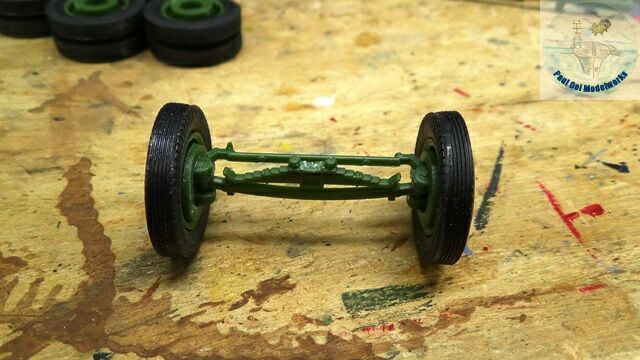 The front axle set is designed to be able to pivot (but not connected to the steering wheel). However, since the tie bar is so fragile, I decided to glue the assembly in place instead.
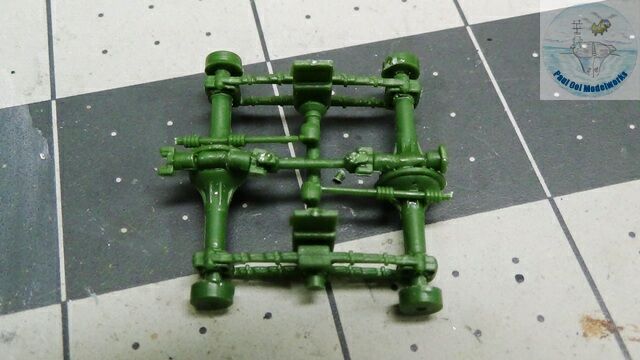
 The rear dual-axle assembly is complicated and requires careful alignment and handling so that the wheels are level.
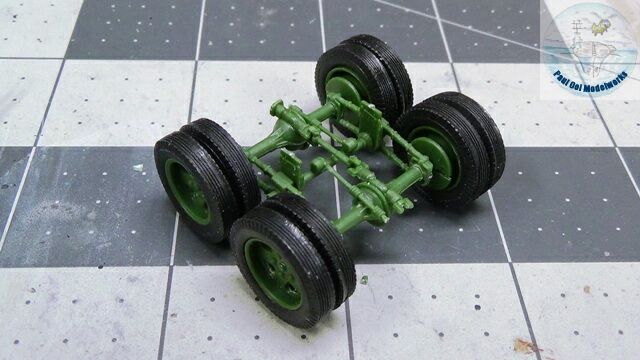
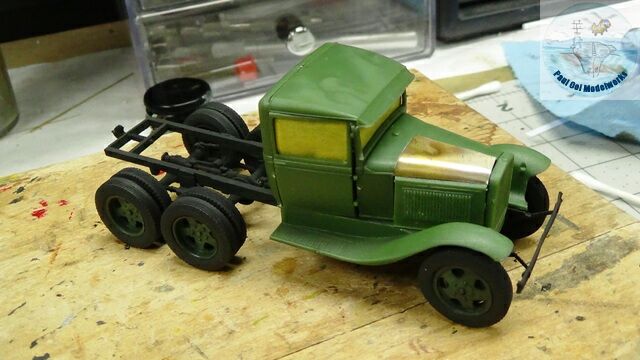
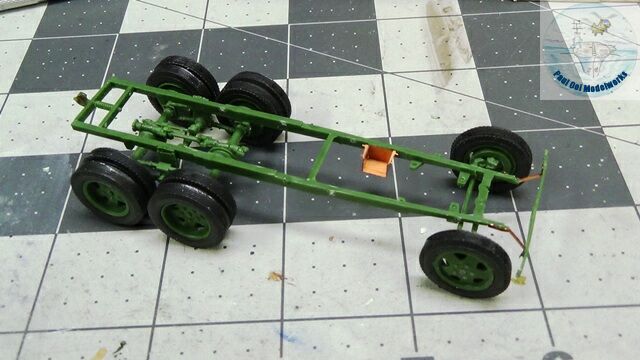 The axle sub-assemblies are attached to the chassis frame. This is a good time to check for the coplanarity of the tires on a flat surface.
 The chassis assembly is primed with Tamiya NATO Black XF69.
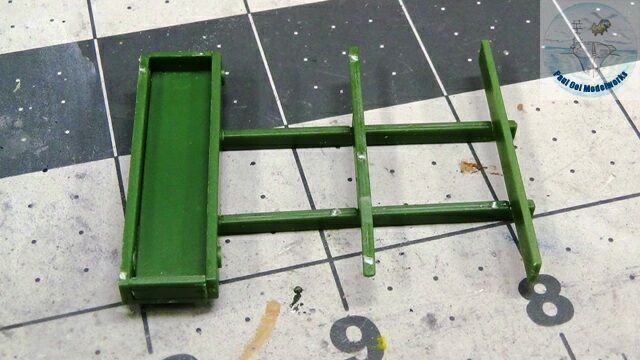
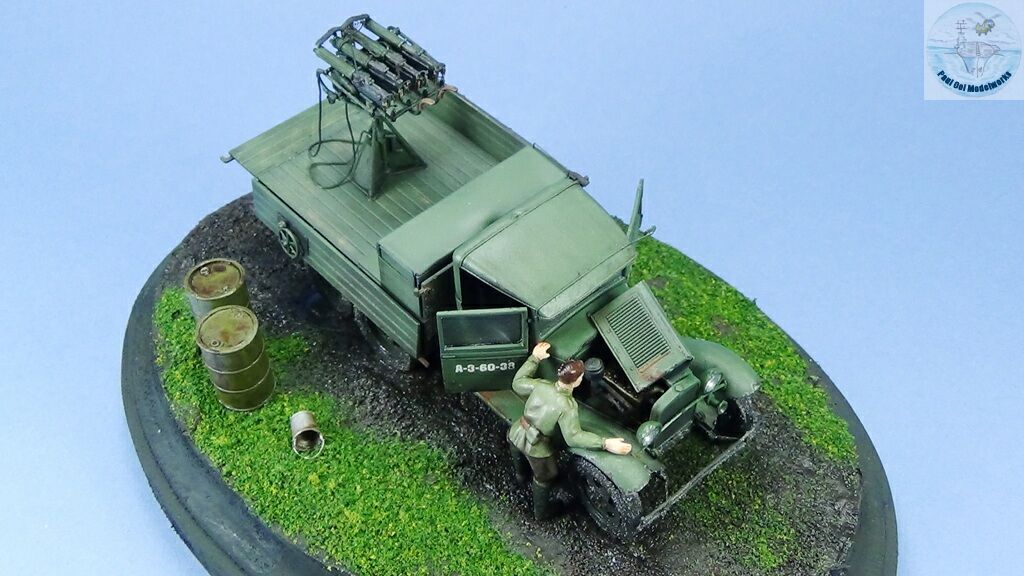
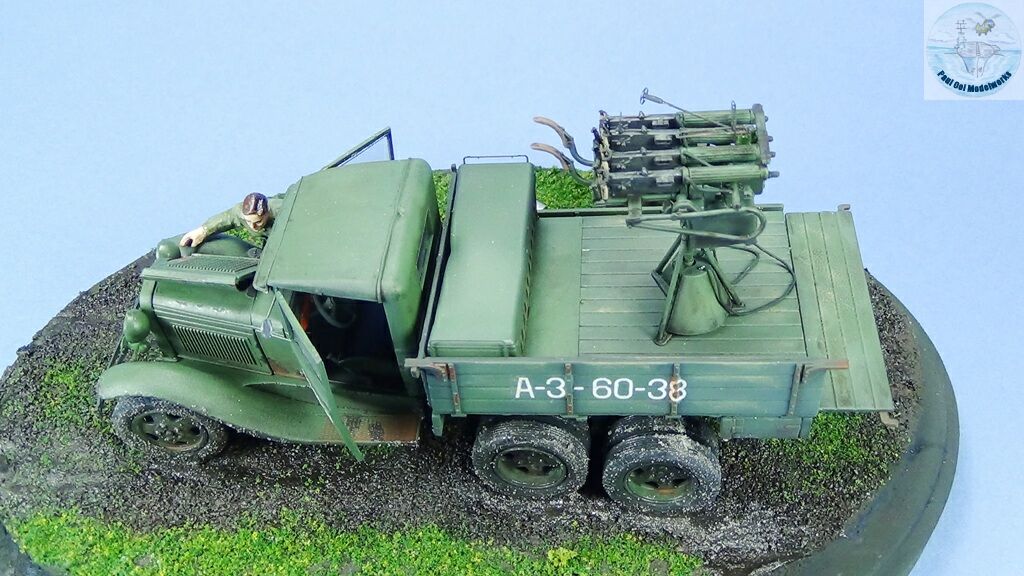
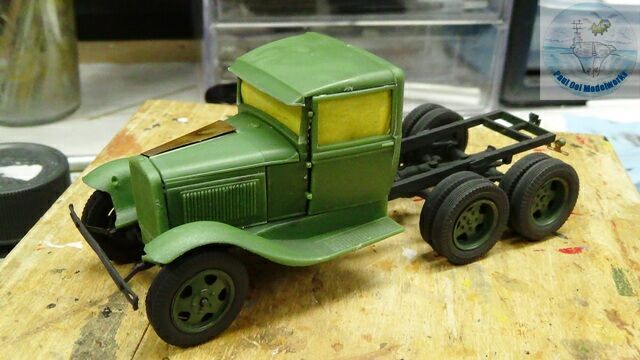
 Next, I build the wooden flatbed assembly. Only two of the four flatbed side panels are installed as the remaining two will be displayed in the deployed position.
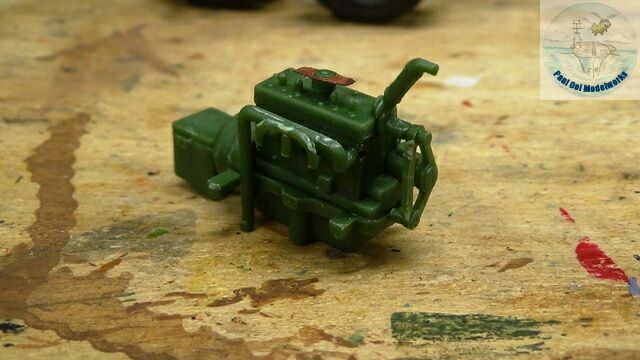
 The engine block is built and mounted on the chassis. It is painted in aluminum. The timing belt and alternator are painted in black.
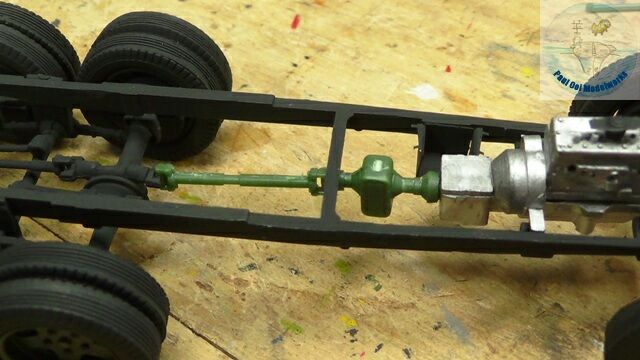
 The transmission parts are inserted to connect the engine to the rear dual-axle sub-assembly. Then the engine block is weathered with Vallejo Sepia wash 73.200.
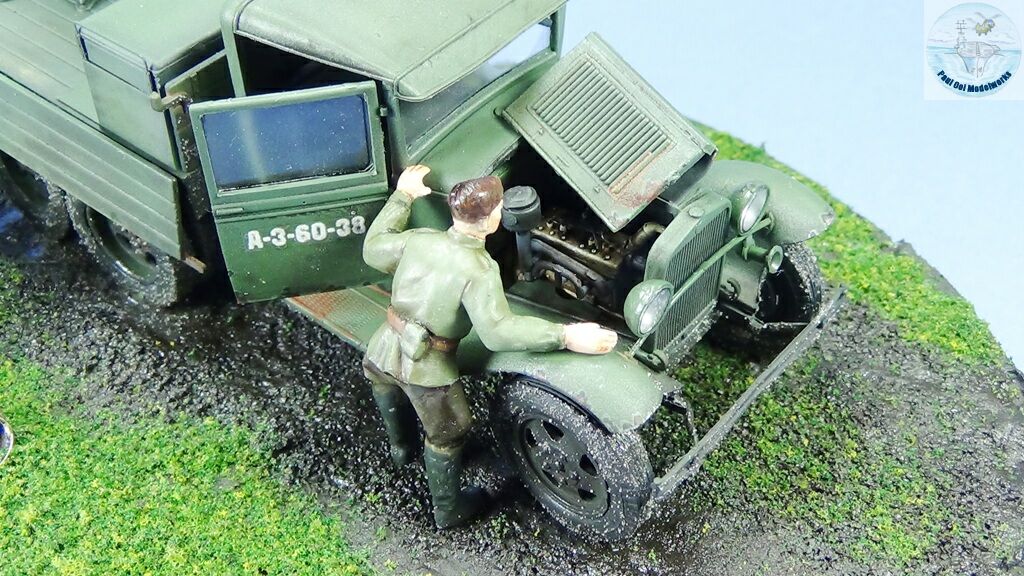
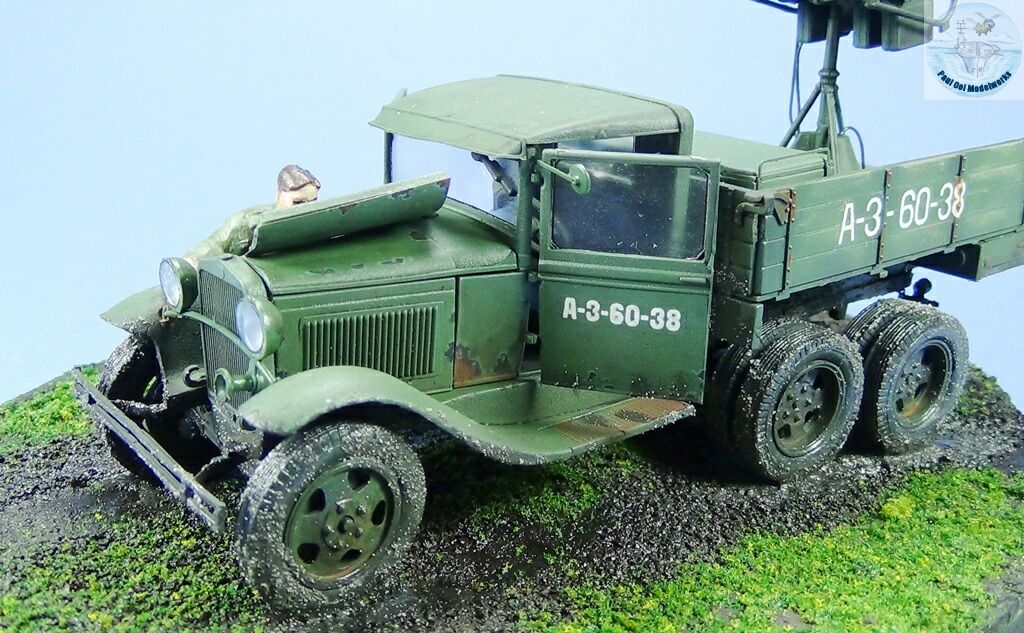
 The floor and steps of the main cabin fits over the engine assembly through the specially shaped cutout in the floor piece. This needs a bit of adjustment as there is interference between the actual engine block and the floor piece cavity.
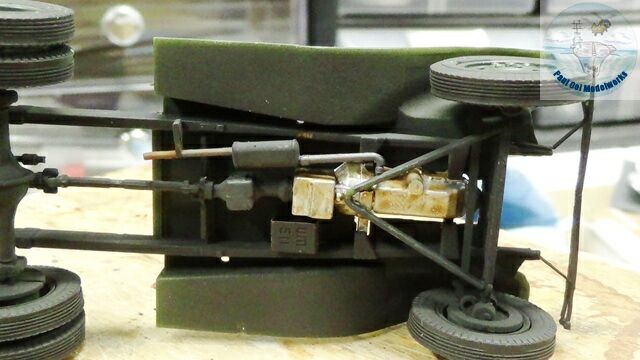 The exhaust muffler is attached to the engine manifold outlet.
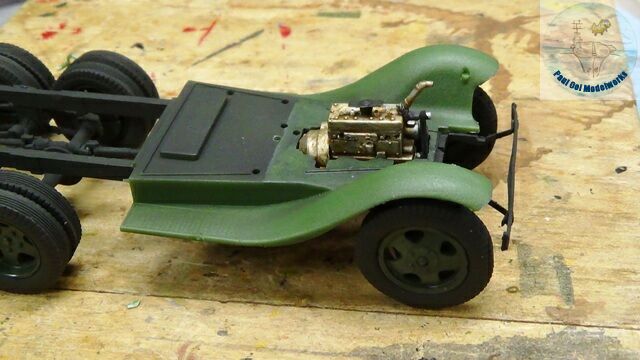
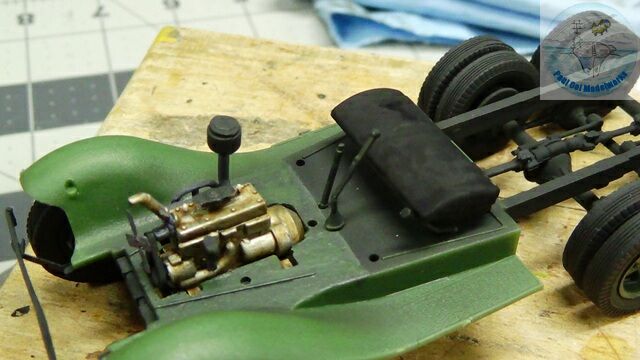 You can see the details on the engine block, and the control levers and bench seat for the main cabin.
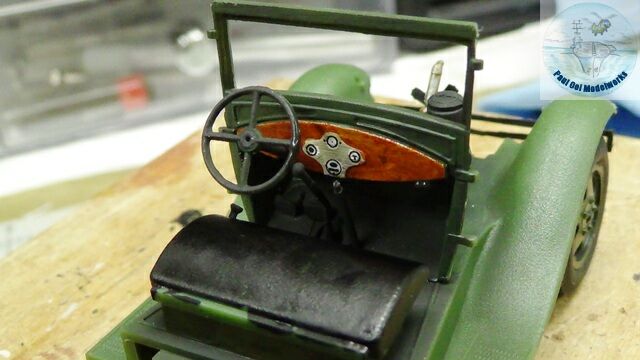 The dashboard and bulkhead piece is detailed with the “wood panel” painting finish. The base is Tamiya Deck Tan XF55, and then overlaid with Burnt Sienna oil paint. The instrument panel uses the decal supplied by the kit over white dials.
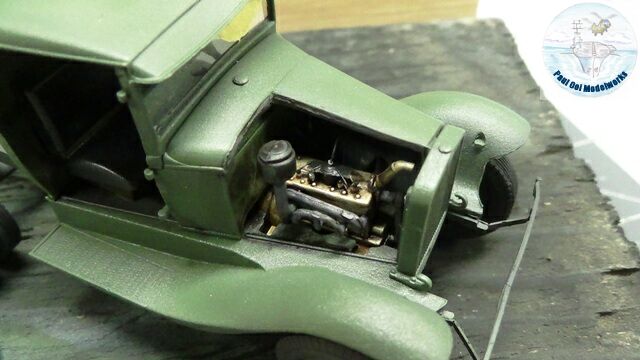
 At this point, I do a dry fit of the main cabin panels and flatbed. Notice that the kit parts for the hood would actually totally enclose the engine details. I felt that would be such a waste of such fine details, so the next few steps are an exercise to create the opened hood doors.
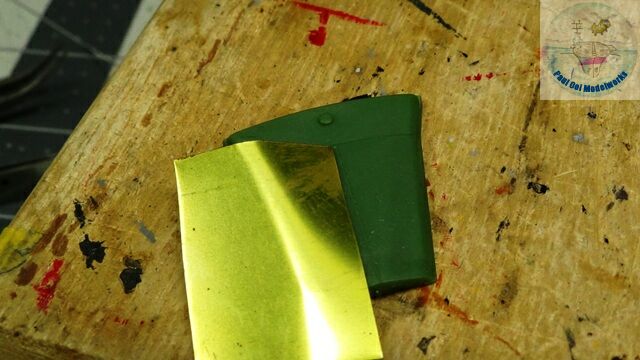
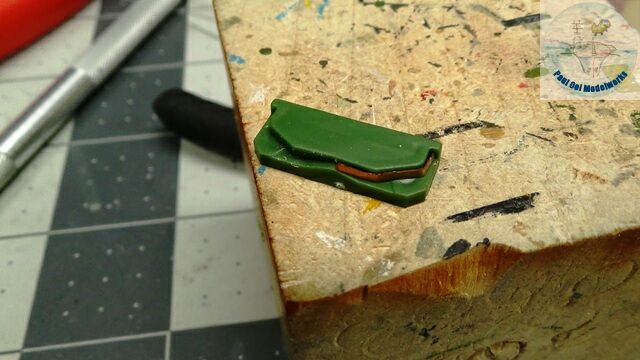
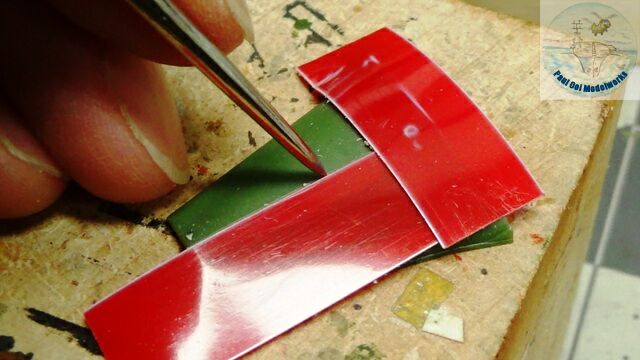
 Cutting a small piece of thin brass sheet, I trim the excess and press the brass over the plastic kit part.

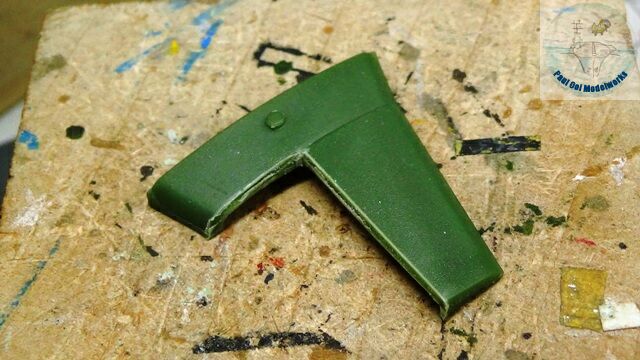 Using plastic Dymo tape to protect the hood piece, I use a scriber cutter to carefully score the panel lines to remove the section of the upper right door.
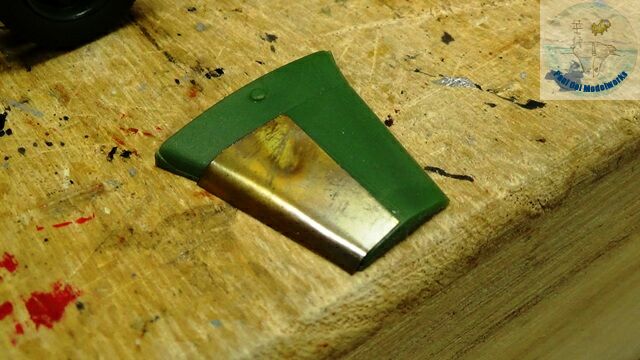
 This is what the engine compartment and hood looks like after the upper right hood door removal.
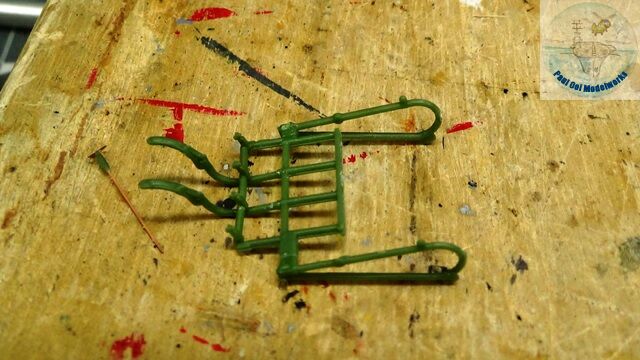
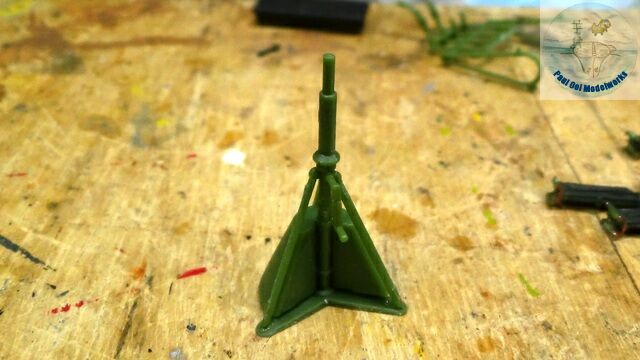
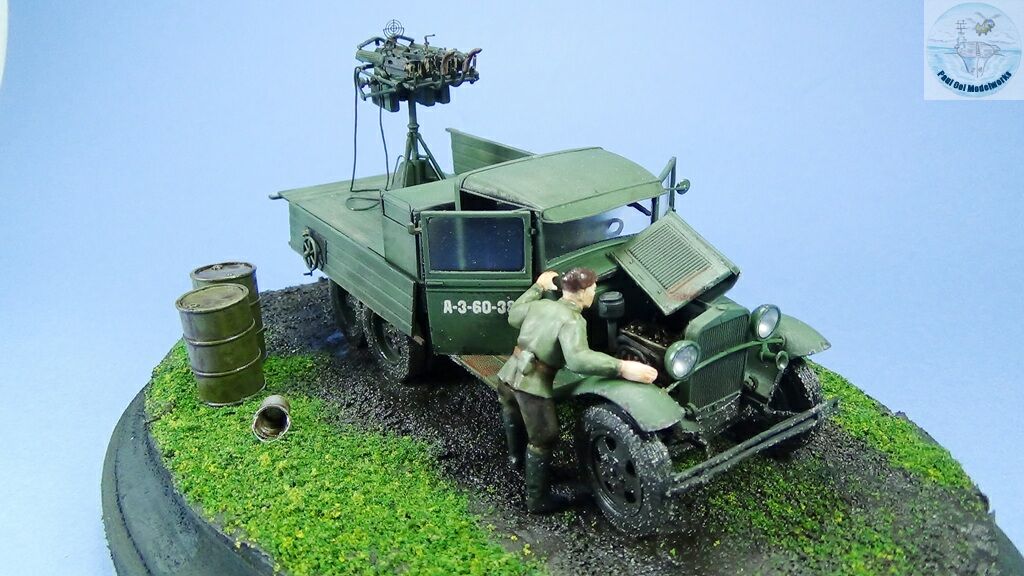
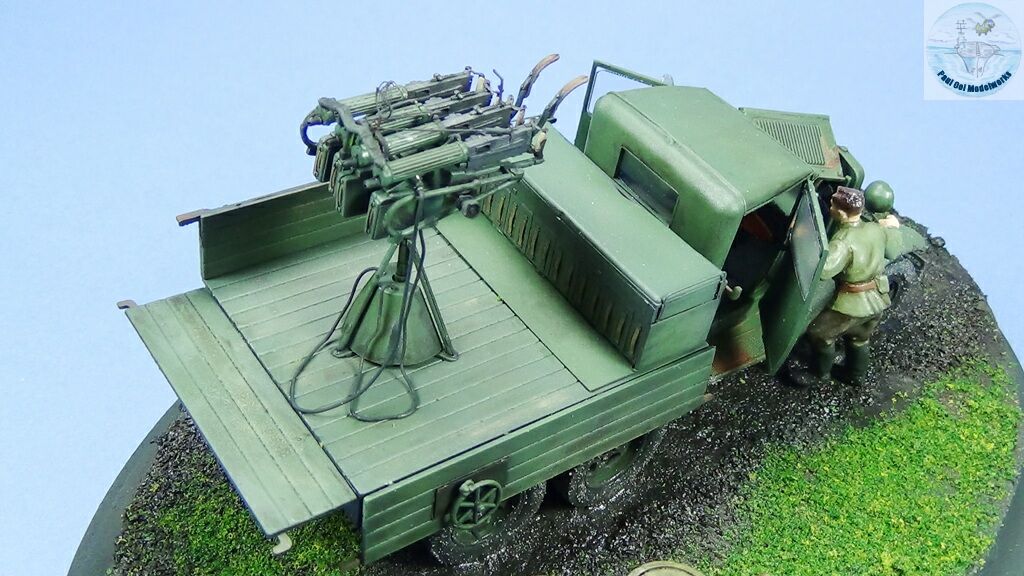
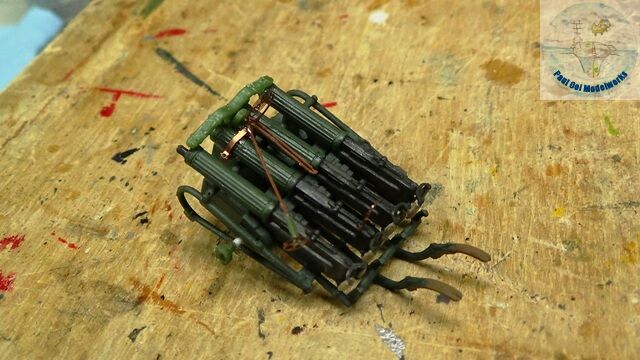
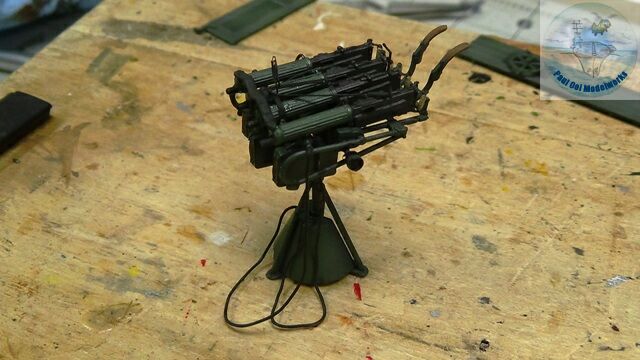
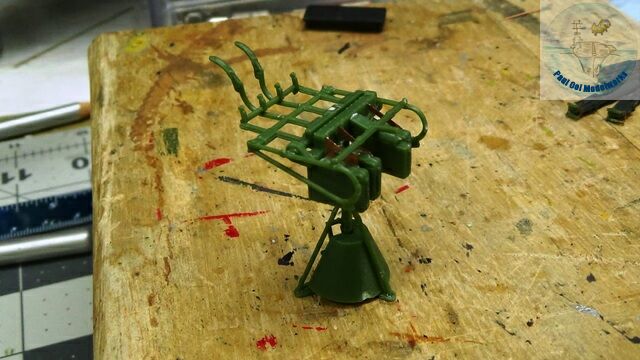 The intricate and fragile quad frame is comprised of several parts. The frame is such that there is very little rigidity in it, so careful alignment and leveling is needed to make a final quad array that is straight. Together with the ammo box holder and stand, building this sub assembly took 2 whole days.
 Masking the windows and windshield with tape, I temporarily attach the cabin doors and hood cover doors.
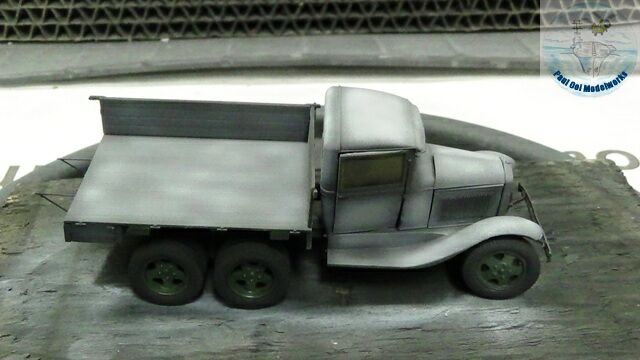
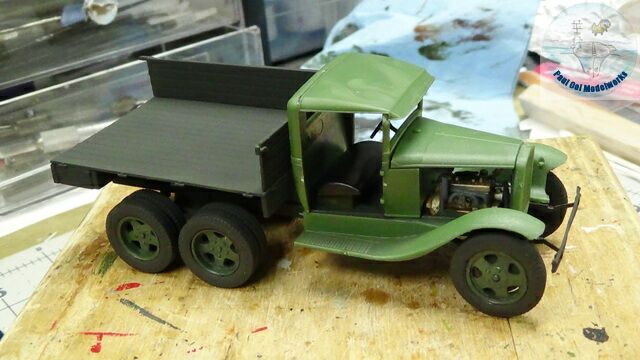
 After priming the truck and flatbed with Tamiya NATO Black XF69, and highlighted with Tamiya Sky Grey XF19, The truck is airbrushed with Model Masters enamel Russian Armor Green 2129.
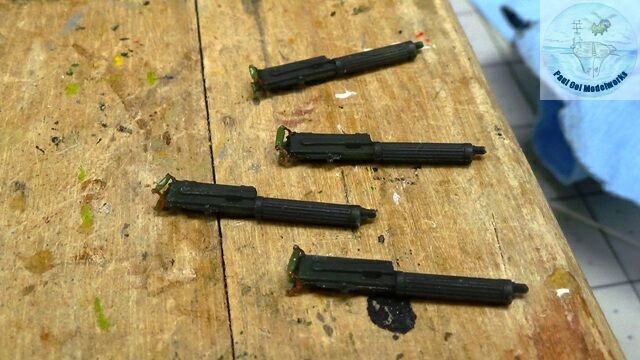
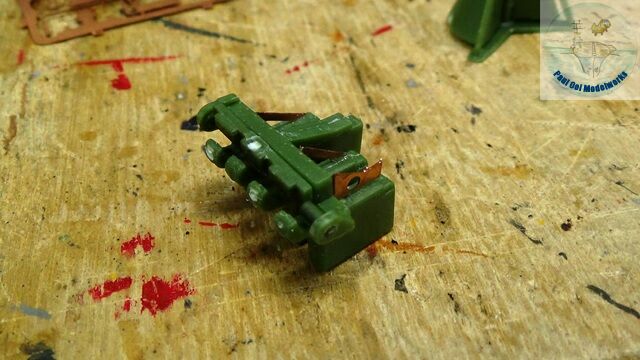
 The Maxim machine guns are primed with NATO Black, and then the barrel jackets are painted with Russian Armor Green. Then they are mounted onto the quad frame.
 Solder wires size .015″ diameter are used as cooling water hoses connected to the barrel jackets.
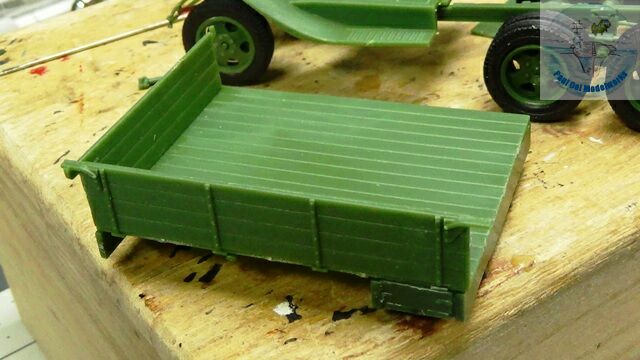
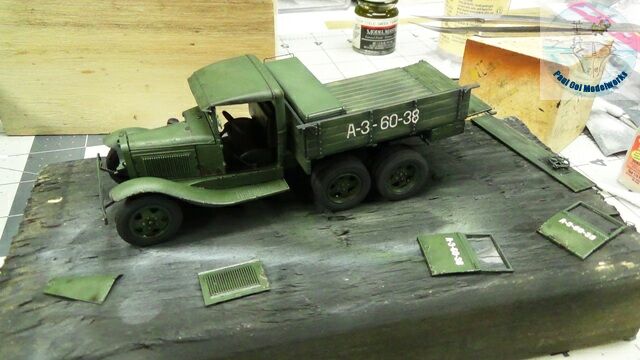
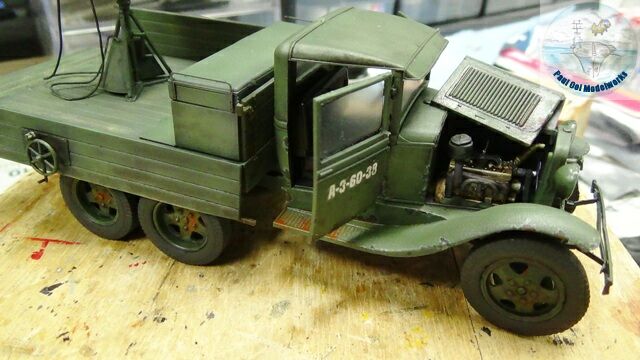
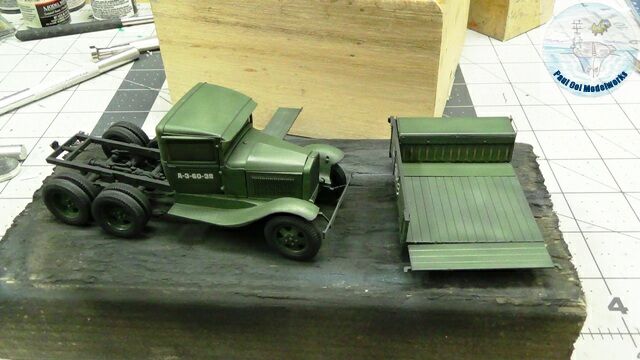 The wood sections of the flat panel bed are weathered with dry-brushing some Tamiya Wooden Deck Tan XF78. Decals are applied and sealed with a satin varnish.
 Small wires are attached to connect the alternator to the spark plugs. Rust colored pastel chalk is applied to the manifold.
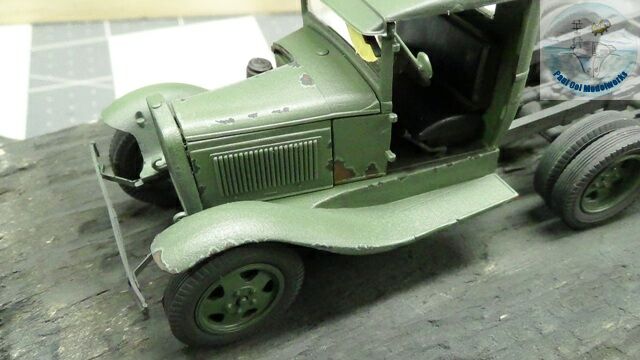 Weathering of the metal cabin starts with painted paint chips. The chip is outlined in SAC Bomber Green FS34159, then the dark areas in NATO Black XF69, and rust patches in NATO Brown XF68.
 Acetate glazing is applied to the windshield and cabin doors.
 An oil wash of 1:1 Black and Burnt Umber is applied to the entire truck.
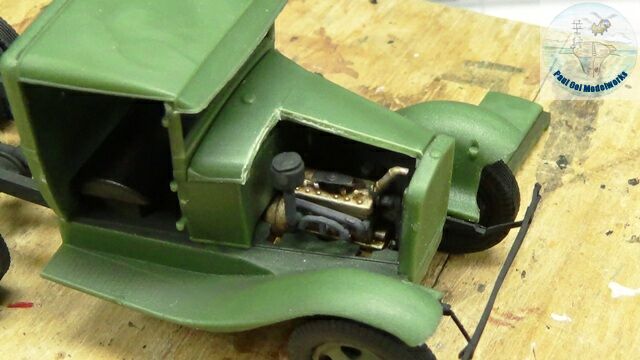
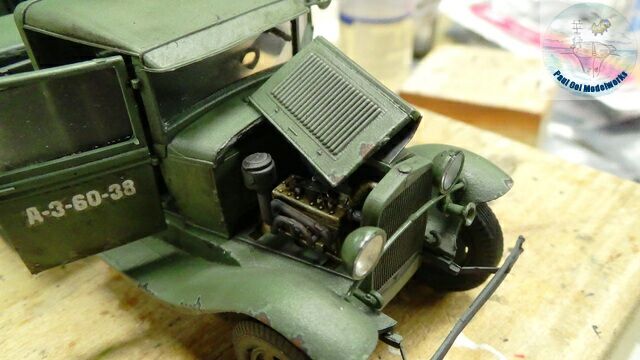 The hood cover doors are finally installed. Just a note here that I did thin down the kit part with the grating to match the brass top section. The look is marvelous!
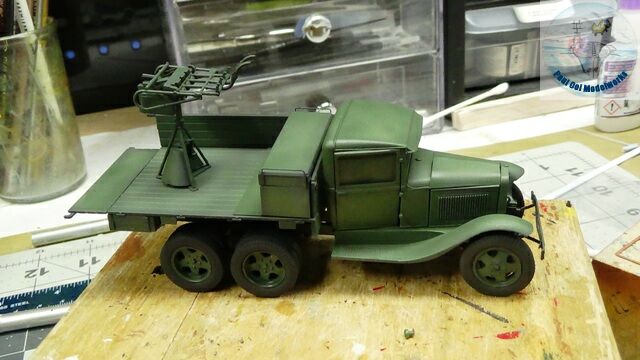
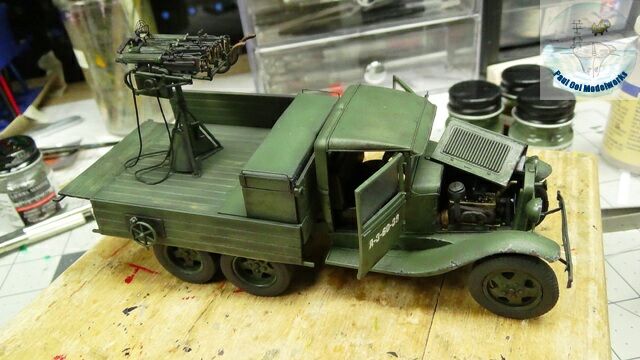 I finally glue all the different sub-assemblies like the flatbed and the quad guns together onto the truck.
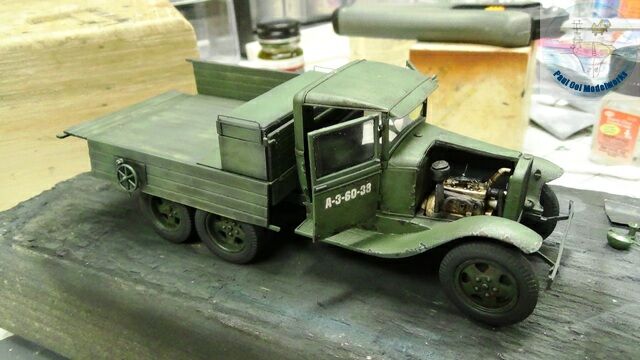
 I apply some thick oil wash of 100% Burnt Sienna for accumulated rust stains on the floorboards and wheel hubs.
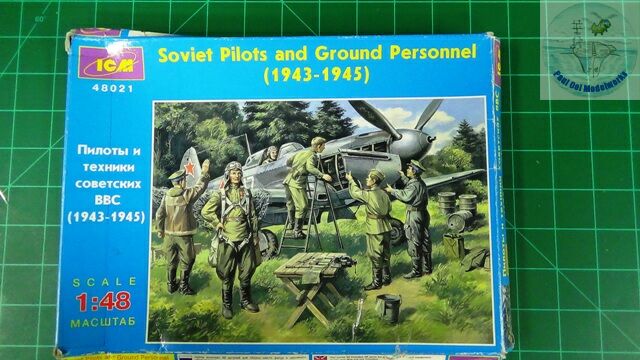
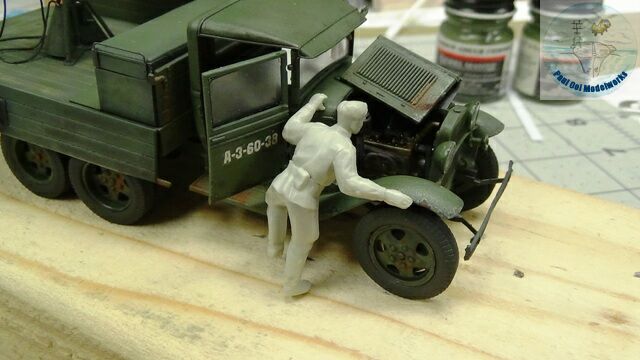
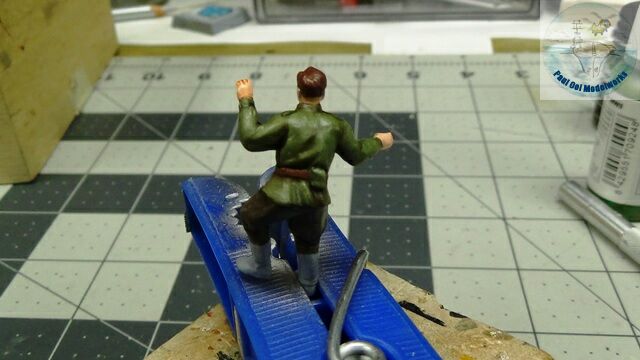
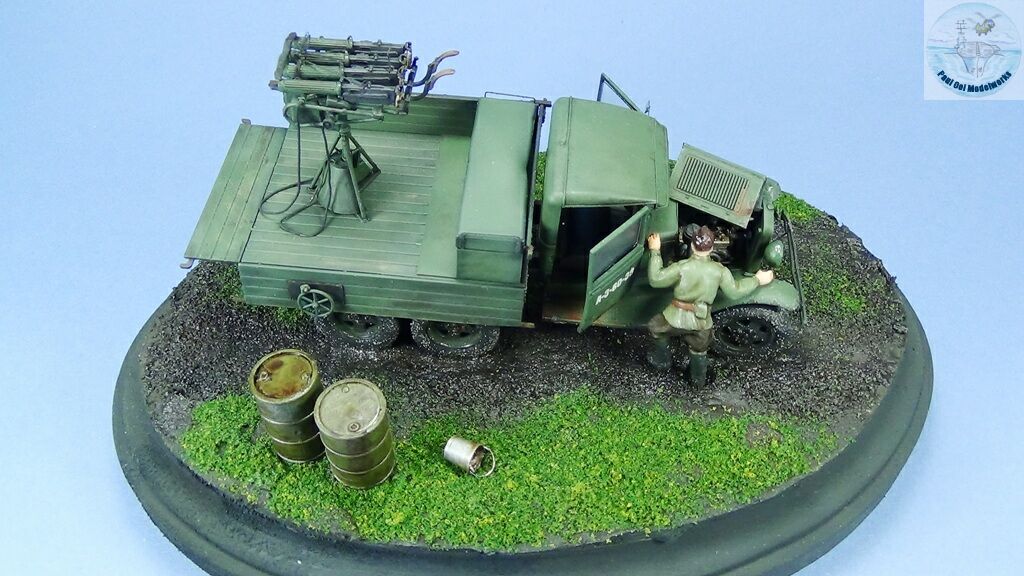
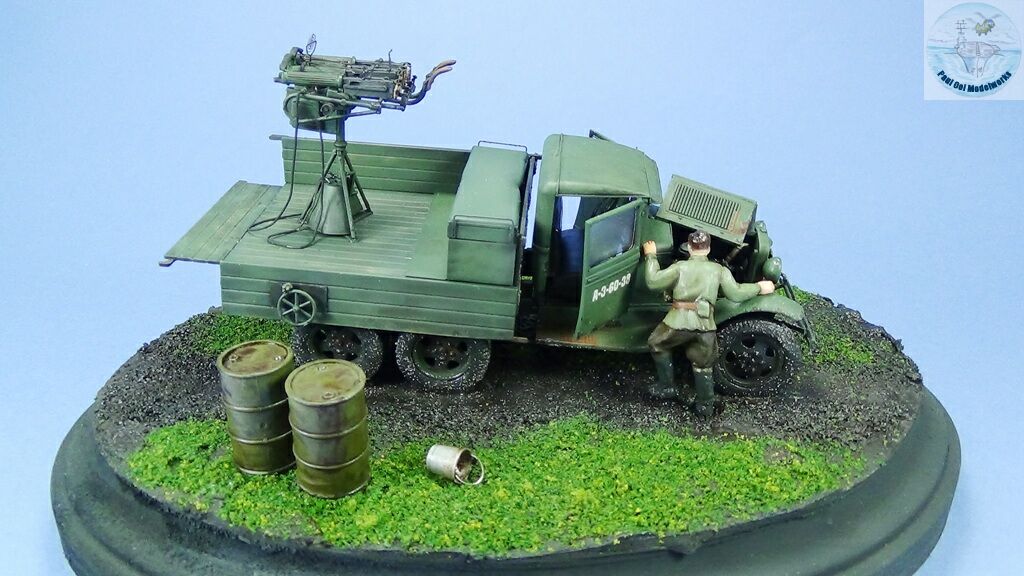
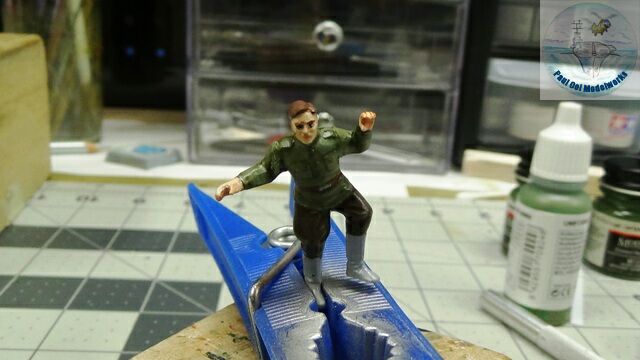 I managed to find a suitably irate driver figure to hunch over the open engine compartment from a 1/48 Soviet ground crew set from ICM. I also managed to get several Soviet oil drums and a steel bucket from that same kit.
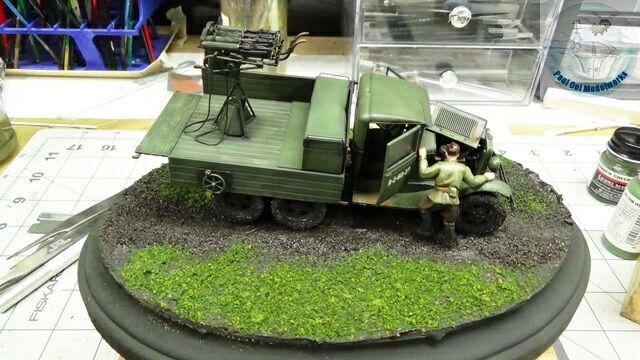 Mud is applied with a brush onto the undersides and tires. The mud sludge is made by mixing Vallejo Sand Paste with Vallejo Russian Splash Mud 73.802. Then the truck gets to park on a muddy lane on a late spring day.
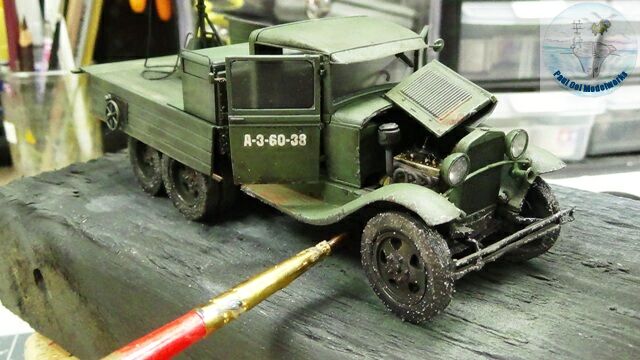
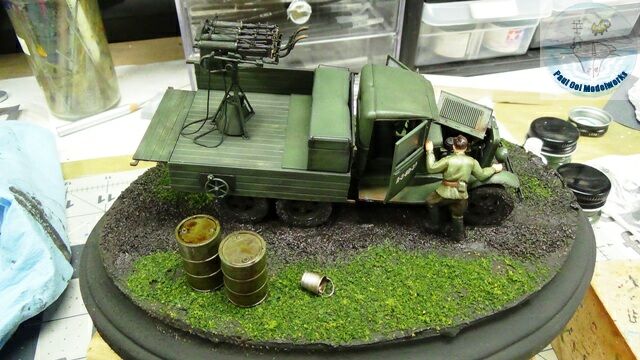 I added two Olive Drab fuel drums and a steel bucket. Now Igor the driver can proceed to fix his truck in this rear rest area.
Leave a Reply