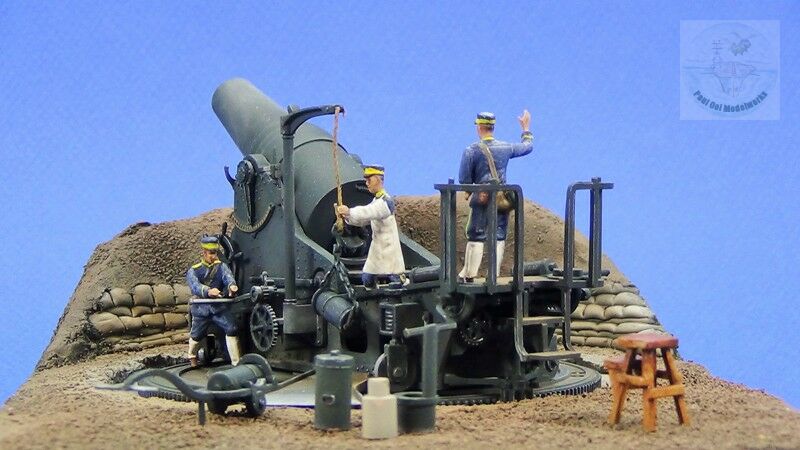
Making a diorama with a gun emplacement requires planning because unlike artillery pieces sited on open ground, one has to “construct” the space, very much like a building project. The type of emplacement and accompanying earthworks shown here can be used for vignettes portraying the period of the late 19th century (American Civil War onwards) through to parts of the 2nd World War. The construction technique for the earthworks can also be applied to WW1 trenches.
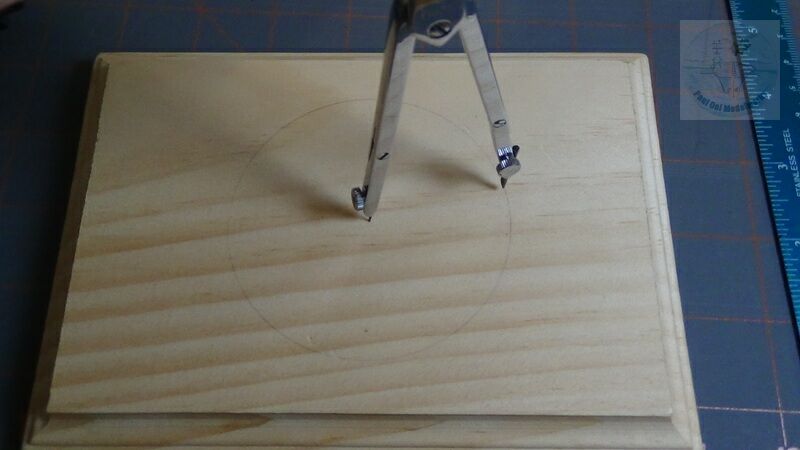
I start by marking out a circle needed to locate the gun platform using a protractor. In this case, I needed a 76mm diameter circle.
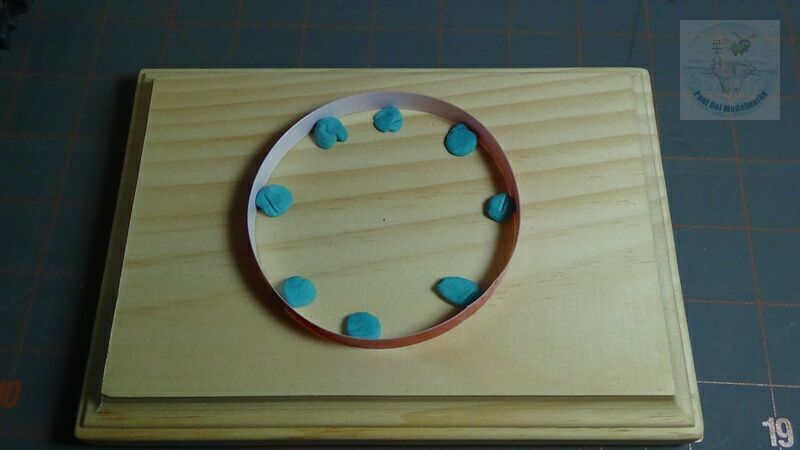
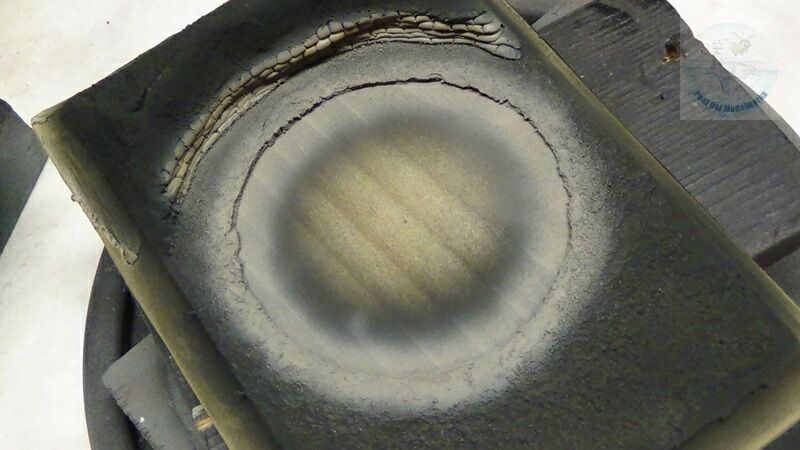
In order to “mold” the historical concrete well used by the Japanese 28cm Howitzer, I used plastic Dymo tape to form a circle with a diameter of 76mm. The length of the tape needed is the circumference of that circle, so to calculate , just use the formula: Circumference = 3.14 x diameter of circle. Once placed on the wooden plaque, I stiffen the circle to prevent collapsing using some removable putty.
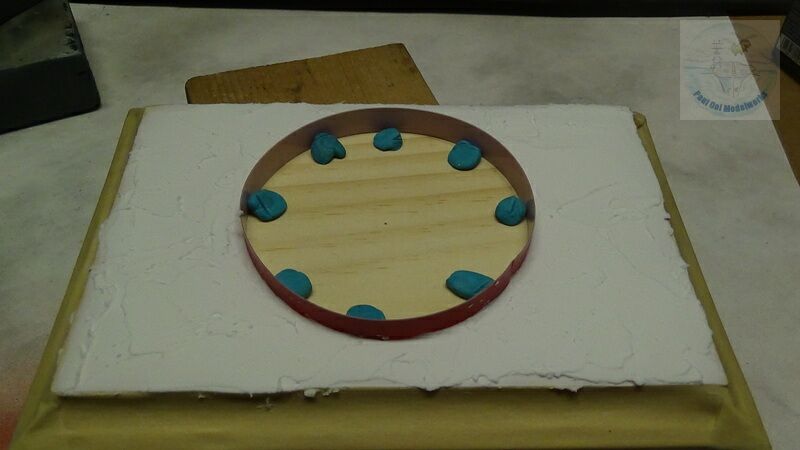
The next step is to mask the edges, then apply light weight plaster for landscaping the flat ground around the circle, being careful to build a consistent edge around the circle of tape. Celan off any excess deposits on the Dymo tape.
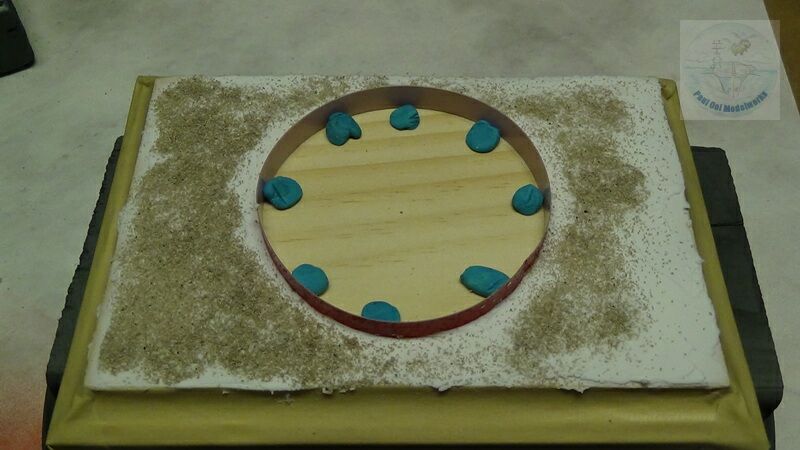
While the plaster is still a bit wet, press in fine talus that can be found from hobby railroad landscape supplies. Shake off the excess talus.
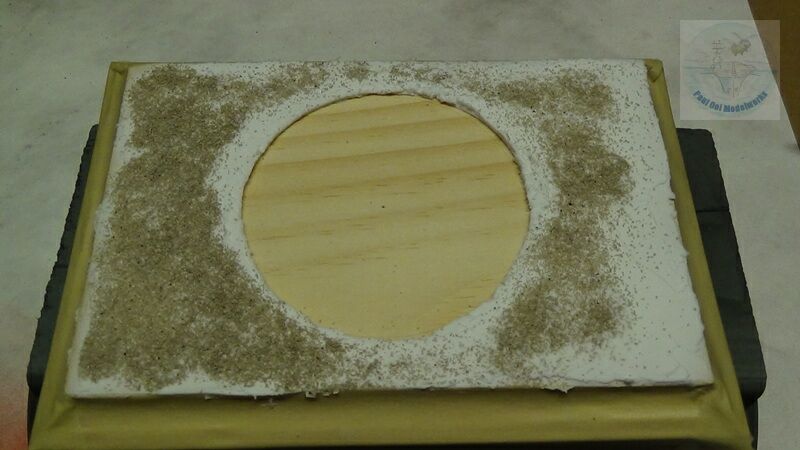
When the plaster is almost dry, remove the Dymo tape ring. You do not want to wait until it is totally dry because it will be difficult to remove the tape, and when you do, it will lift off chunks of the circular edge. With the slightly wet plaster, it is easy to repair the edges.
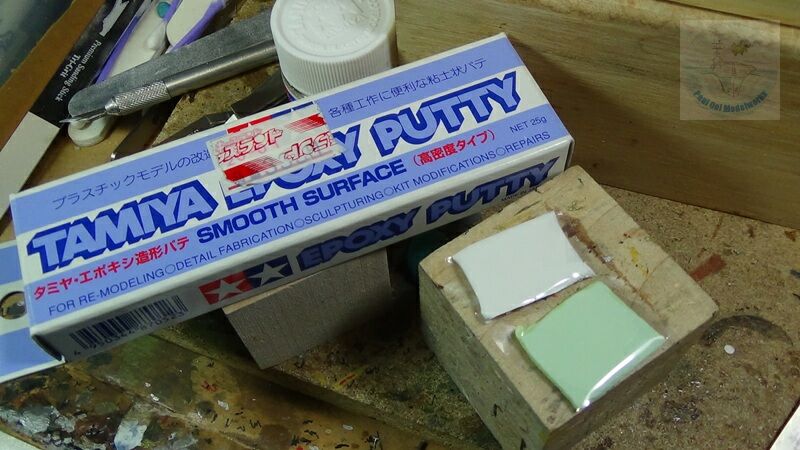
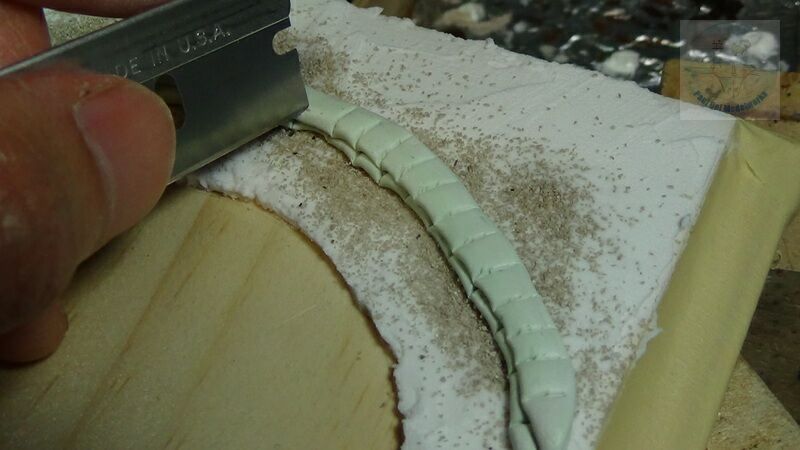
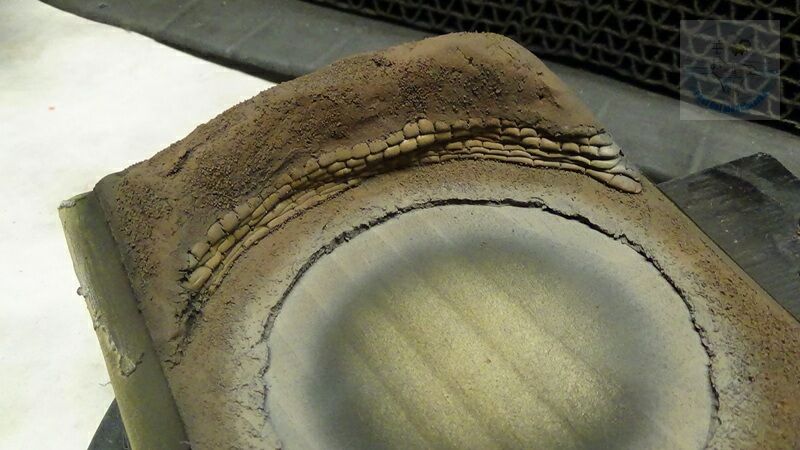
When the first layer of plaster has dried properly, I add the resin “sandbags”. I use Tamiya’s 2-part epoxy compound, working with small amounts at a time. These take 12 hours to fully harden and they are easy to sculpt. I roll small strips of the epoxy putty and then use a razor knife to press in the edges to form the sandbags.
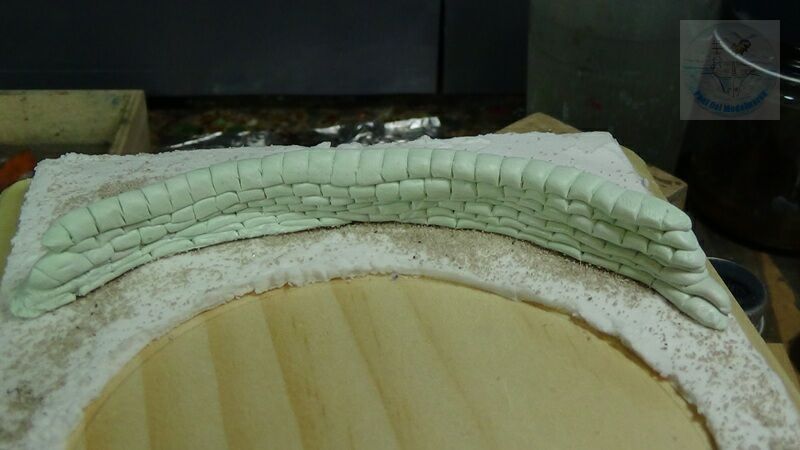
By carefully laying layer upon layer, the sandbag pile grows into a wall surrounding the gun emplacement.
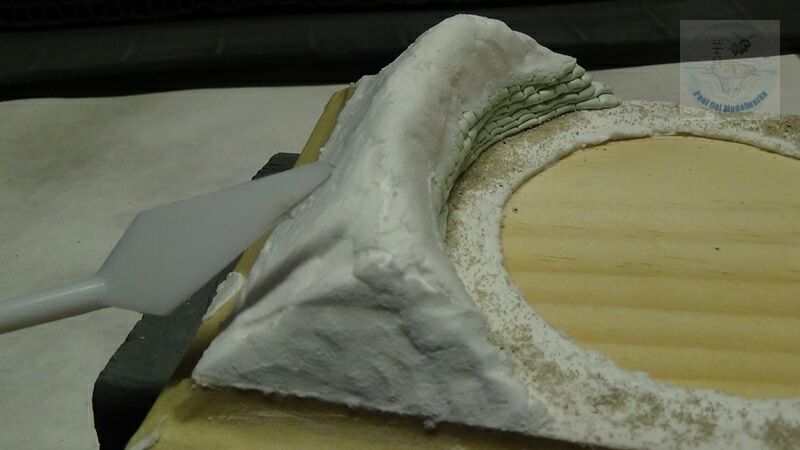
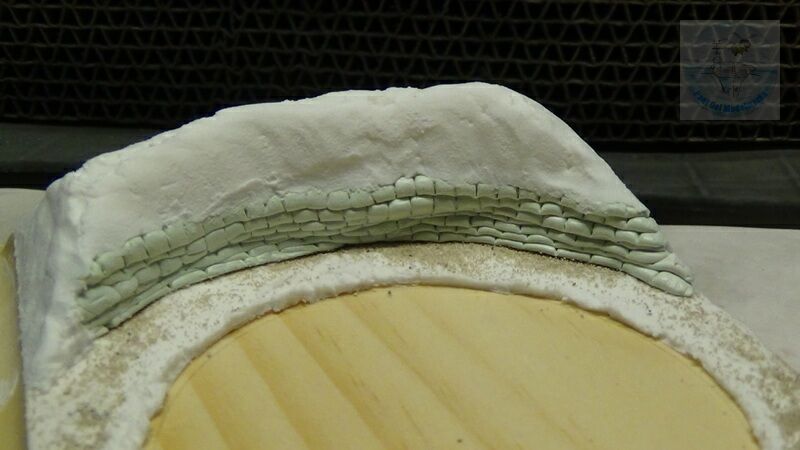
I then added more “soil” piled over the sandbag “retainer wall” to complete the earthworks.
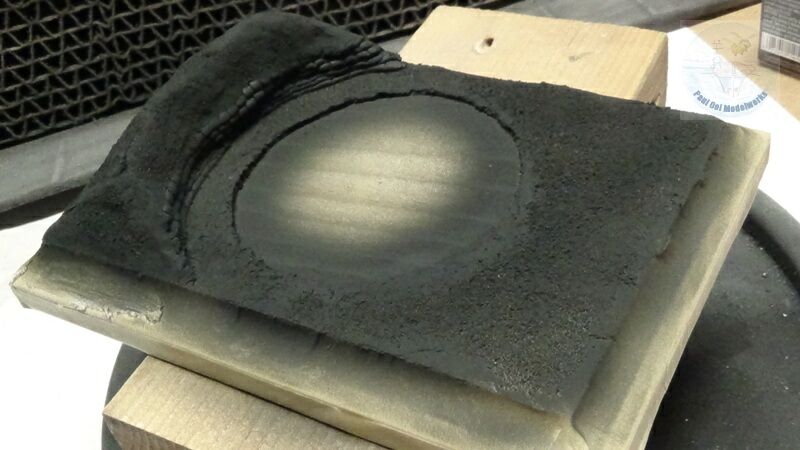
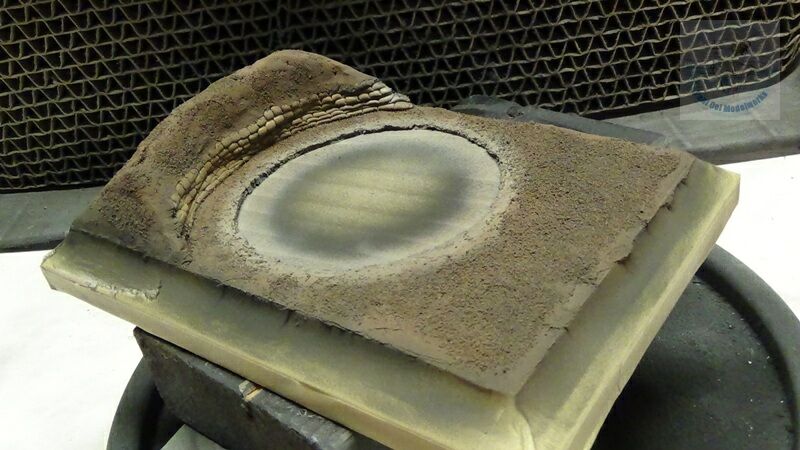
Once the plaster has dried, I apply a first undercoat of Tamiya NATO Black XF69. Next I airbrush Tamiya Buff XF57 on the rows of sandbags. I apply Tamiya Medium Grey XF20 around the concrete emplacement ring, and finally Tamiya Flat Earth XF52 for the dirt.

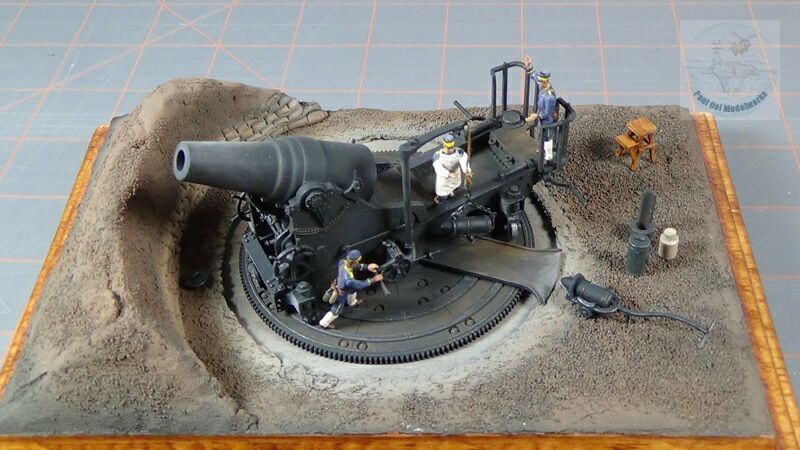
After the edging borders have been stained and varnished, the base is ready for the artillery piece and the crew figures. That’s when the rest of the fun comes in.